TUTORIAL SEXY VALENTINE
ENGLISH VERSION
ENGLISH VERSION
This tutorial was made by me Dilcia aka Disyas Digitals Designs,
in January 25th, 2011. Was made from my own ideas, any
Any resemblance to other tutorials is purely coincidental.
This tutorial was made in PSPXI, but you can make it in other version.
NEEDED SUPPLIES:
PTU Kit "Romanza", you can buy it here or here.
Tube "Cupid" by Keith Garvey, you can buy it here.
Font Annabelle or you can choose the font that you prefer.
My mask number 9, you can find it here http://disyasdigitalsdesigns.blogspot.com/2010/02/english-masks.html
STEP 1
Open a new canvas 600x600px, transparent, 72 dpi
Open the paper Disyas_Romanza_P13

STEP 2
Choose the tool Selection with the next settings: Rectangle, Add, 0
 Draw a Rectangle as you can see in the image.
 You will use the paper that you opened
as color of Foreground.
Go to your Foreground and select a Pattern, look
for the paper that you opened and choose it.


Now take your Flood Fill tool and fill your selection.
Selections/Select None
STEP 3
Open the frame Disyas_Romanza_Fr7
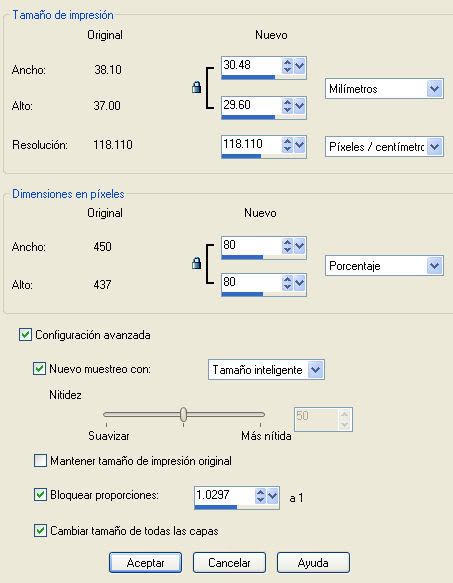
Resize the frame by 60%
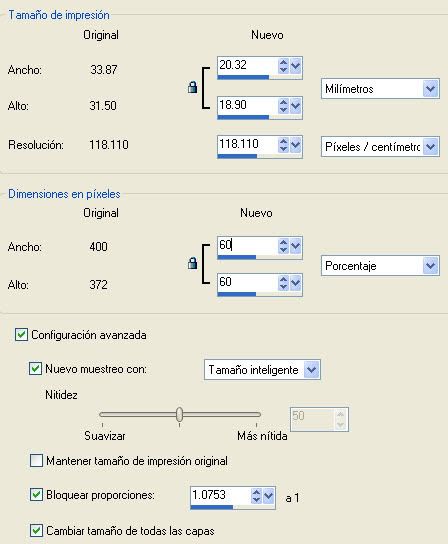 Edit/Copy
Back to your canvas
Edit/Paste as new layer
Let's go to rotate the frame to the right side by 25º,
Use the next settings:

With your Move Tool, place the frame at the upper right corner
of the rectangle that you filled with the paper.
STEP 4
Duplicate the frame,
Layer/Duplicate
We need other frame in the other side of the rectangle, so, go to
Image/Mirror
Now we have 2 frames =).
STEP 5
Open Disyas_Romanza_Emb7
Edit/Copy
Go to your canvas
Edit/Paste as new layer
With your Move Tool, place the border as you can see in the image
PASO 6
Open Disyas_Romanza_Btn9
Resize by 70%
Edit/Copy
Go to your canvas
Edit/Paste as new layer
With your Move Tool, place the btn-heart as you can see in the image
STEP 7
Open Disyas_Romanza_El34
Resize by 60%
Edit/Copy
Go to your canvas
Edit/Paste as new layer
With your Move Tool, place the bottle in the
place that you can see in the image.
STEP 8
Open Disyas_Romanza_Gift7
Resize by 70%
Edit/Copy
Go to your canvas
Edit/Paste as new layer
STEP 9
Open the close up tube
Edit/Copy
Go to your canvas
Edit/Paste as new layer
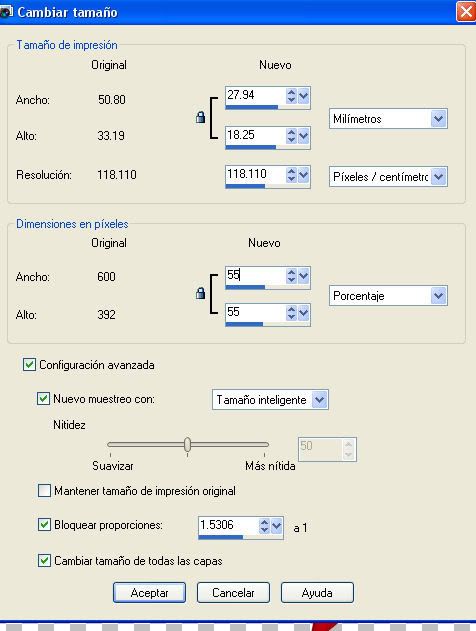
We will resize the image in the canvas
Please, put special attention to this settings:
 Resize by 60%
Not select "Resize all layers"
STEP 10
Now, we will rotate the tube to the right with the same settings
that you used with the frame.
With the close up tube rotated, we need to take this layer and
put back to the right frame layer, so go to:
Layers/Arrange/Move Down
Do this untill your tube layer are down of the frame layer.
With your Move tool, place the tube as you can see in the image.
We need to duplicate the tube:
Layers/Duplicate
Image/Mirror
STEP 11
Now, erase the parts of the tube out of the frame.
Activate your frame layer.
Take your Magic Wand Tool with the next settings: Add, RGB Value, Tolerance 20,
Contiguous, 0, Anti Alias selected, outside
 Click out of the frame, you will see that all that area will be selected.
 Go to your tube layer, activate it and press once the Delete key or the Supr Key.
Selections/Select None
Do the same procedure for the other tube closeup with the left frame.
If you finished, activate the top layer.
STEP 12
Open the tube again, this time the full tube.
Edit/Copy
Go to your canvas
Edit/Paste as new layer
Resize the tube by 80% as we did on the Step 3.
"Resize all layers" deselected
With your Move tool, place the tube as you can see in the image.
STEP 13
Open the Mask Disyas_SVMask9 and minimize it
Go to your bottom layer and add a new Raster Layer
Layers/New Raster Layer
Layers/Arrange/Move Down
STEP 14
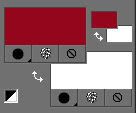
Set your Foreground to #d01938
With your Flood Fill tool, fill the new layer
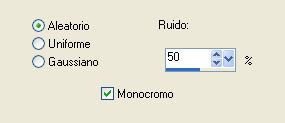
Layers/New Mask Layer/From Imagen
Use the next settings:

Now we have several layers, let's go to Merge.
Layers/Merge/Merge Group

STEP 15
Now, we need to apply shadow to the bottle, the heart,
the chocolate, and our full tube.
Effects/Effects 3D/Drop Shadow, with the next settings: -1,1,60,5, black.
 STEP 16
Go to your top layer
set your Foreground as null and your background as #ffffff
 We will write "Sexy Valentine"
Choose your Text Tool, the font that i used was Annabelle, but you
can choose the font that you prefer. Use the next settings: Annabelle, Size 48, Bold, Center

With your Text Tool active, move your mouse
to the center of your text, when the mouse pointer change to arrow cross
move your text (left click pressed while you move, not release until you finish)
to the place that you can see in the image.
We will convert our Vector Layer to Raster Layer so go to
Layers/Convert to Raster Layer
STEP 17
Apply Inner Bevel to your Text
Effects/3D Effects/Inner Bevel
Use the next settings:Bevel 2, 5, 40, 4, 0, 10, White, 45, 35,40
 STEP 18
Apply Shadow to the Text
Effects/3D Effects/Drop Shadow
with these settings: -1, 1, 60, 5

Great! we finished the tutorial!
Now add your watermark, the copyright of Keith Garvey,
your license number, and done!! Hope you have enjoyed this tutorial!


